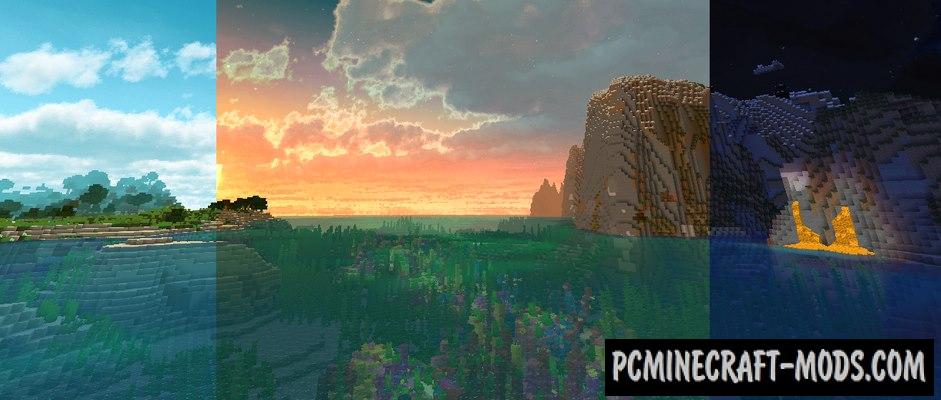
New Default+ 1.20.2-1.19.2 resource was created in order to fill the standard textures with a large number of elements, optimize all this and so that each player gets more emotions from the gameplay. The pack contains a lot of new realistic details in the right style, for example, it should replace the standard sky with a high-quality and pleasant 16x option with its own shaders.
You may think that most of the blocks have remained unchanged, but this is not the case, because, for example, the stove block is shaped like a smiley face, and the diamonds, gold, and emeralds of the blocks have more pixels to get a more expensive look than the usual iron, coal, and other common blocks.
With this texture pack many mobs got a lot of new 16x parts, for example creeper has many variations depending on the biome. The new Default+ can be a huge competitor to the Faithful pack, because it has a completely different way to improve the vanilla textures in the game.
Screenshots
How to install New Default+
- Install Optifine HD (Not necessary but desirable)
- Download the texture pack from the section below.
- Sometimes the authors create different resolutions, Bedrock (Minecraft PE) or Java versions, so choose the option that you like or that you think your graphics card can handle.
- Please note that some releases may contain bugs, incompatibilities with shaders and other graphics addons, and in some cases may cause conflicts within Optifine HD. You can try installing a previous build to fix this.
- Move the “Zip” file to the “Resourcepacks” folder.
- This folder is located at the following path:
Mac OS X:
/Users/Your Profile Name/Library/Application Support/minecraft/
Quick way to get there: Click on the desktop and then press the combination of “Command+Shift+G” keys at the same time.
Type ~/Library and press the “Enter” key.
Open the Application Support folder and then MinecraftWindows 11, 10, 8, 7:
C:\Users\Your Profile Name\AppData\Roaming\.minecraft\
Quick way to get there: Press the “Windows” key and the “R” key at the same time.
Type %appdata% and press “Enter” key or click OK. - Next, use step 14 to complete the installation.
- Launch the game client via the launcher.
- In the main menu of the game, click “Options” button.
- In the “Options” menu, select the “Resource Packs” button.
- Click on the “Open Resource Pack folder” button.
- Move the downloaded zip file to an open folder.
- Click the “Done” button.
- Your pack should have appeared in the left “Available” list, just hover over it and click on the arrow pointing to the right.
- This will move the pack to the right “Selected” list that displays the used packs or shaders and other addons.
- Select the desired resolution, desired addons and click the “Done” button again.
- Now it’s loaded and ready to use in the game world!
Manual installation:
Quick installation:
Created by: SeaOfPixels