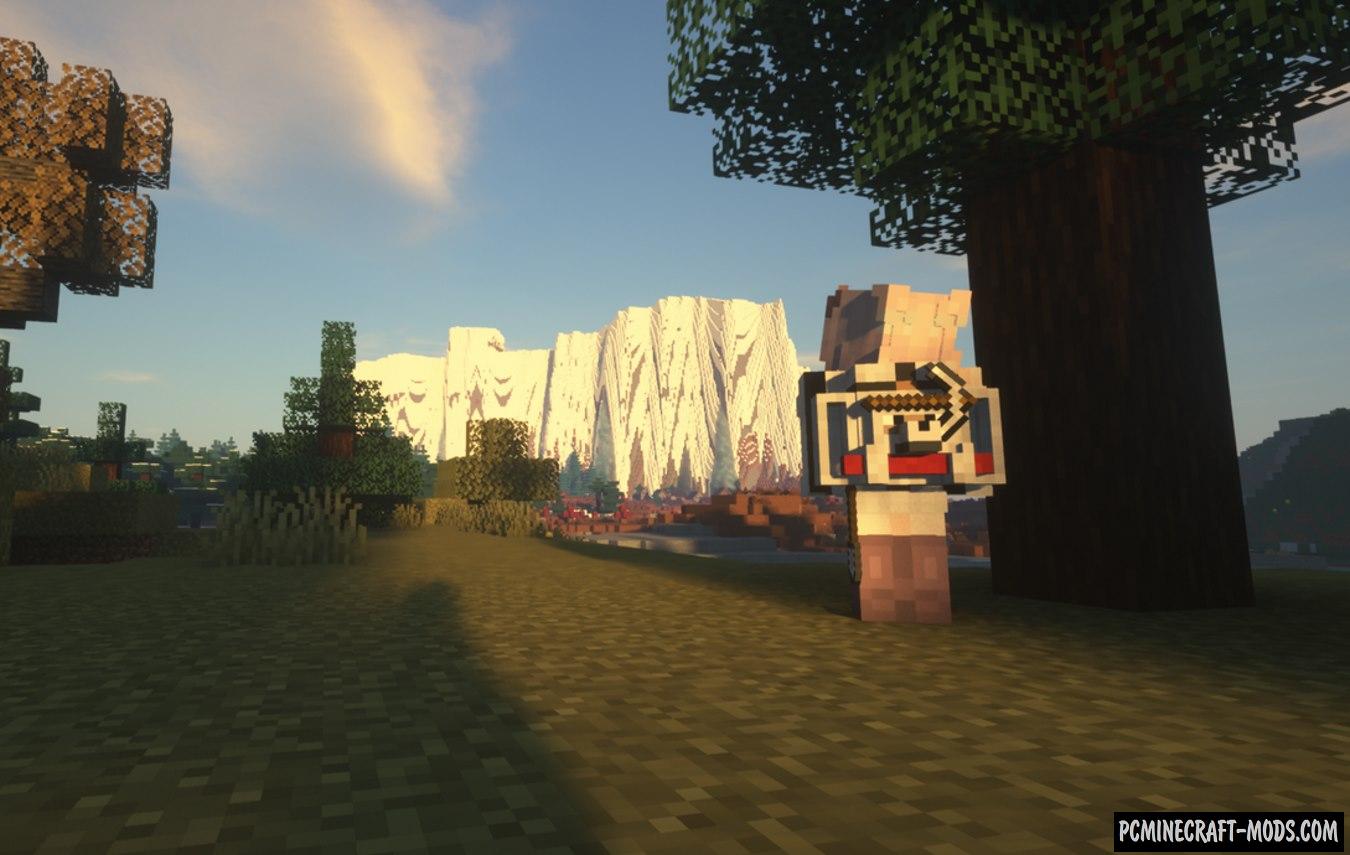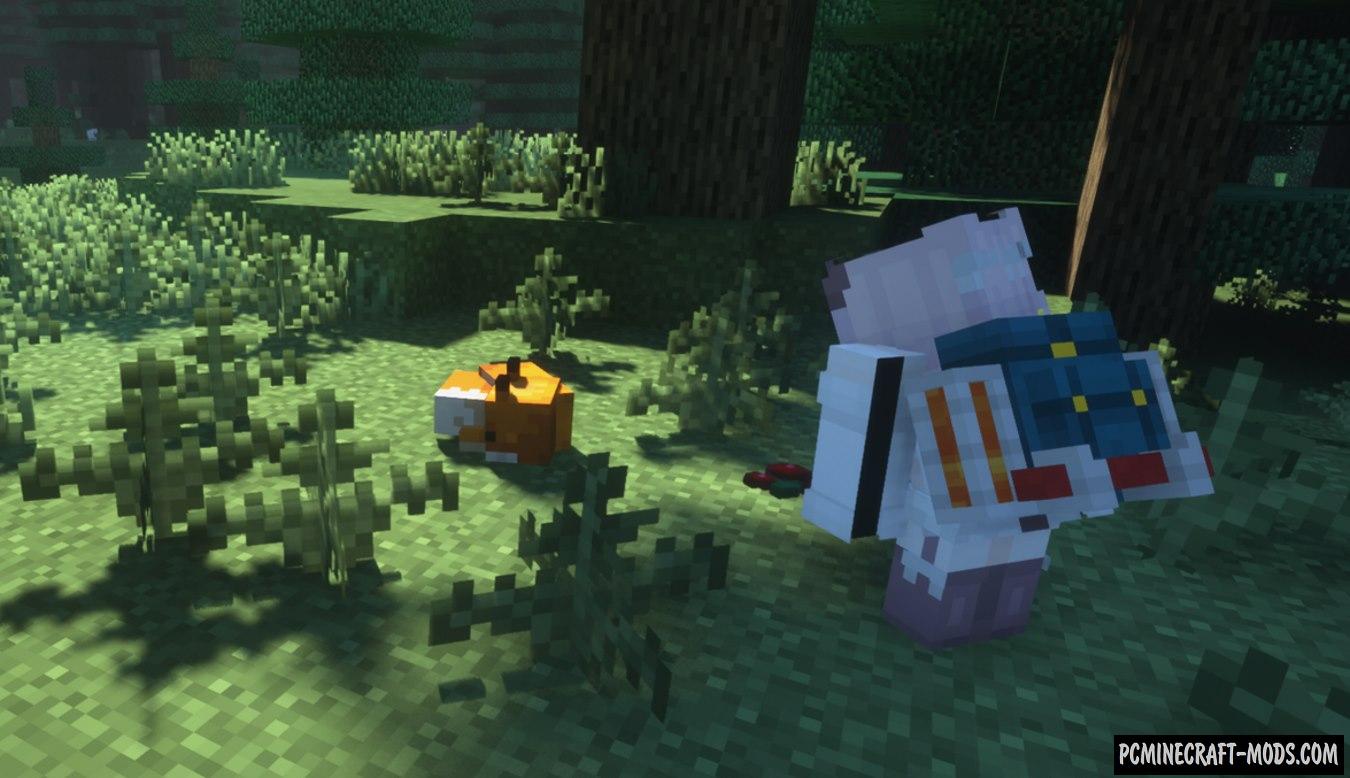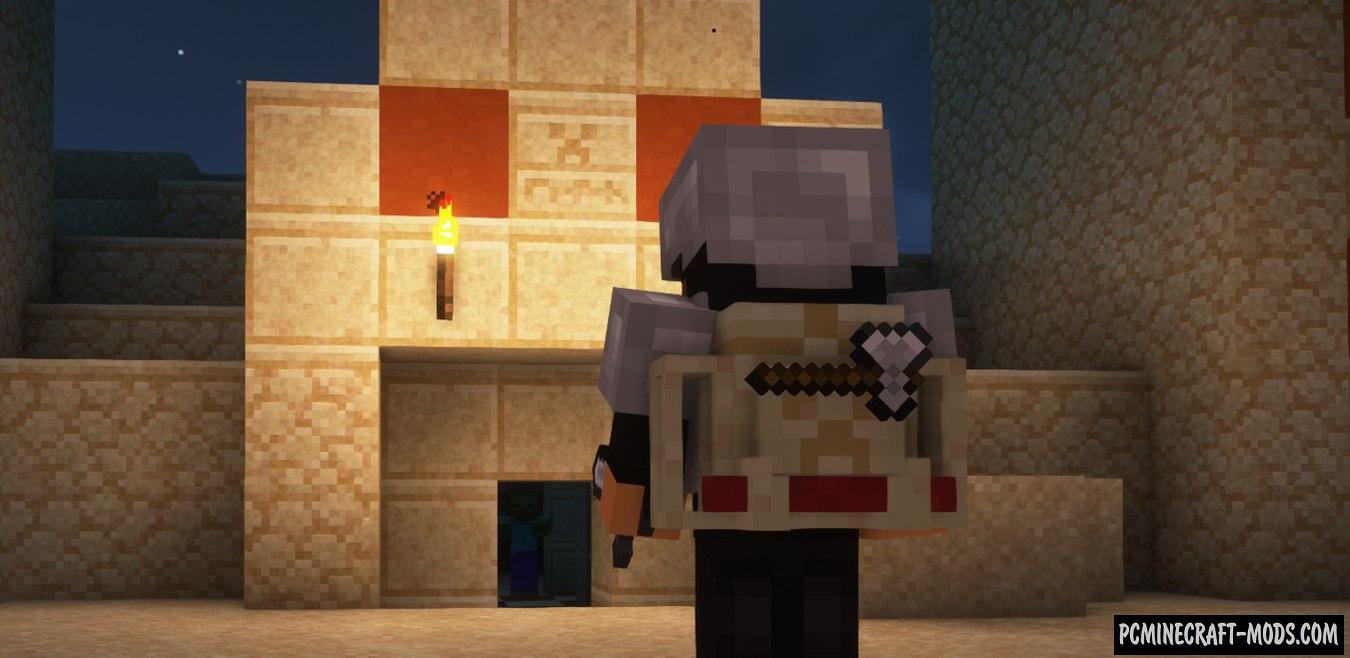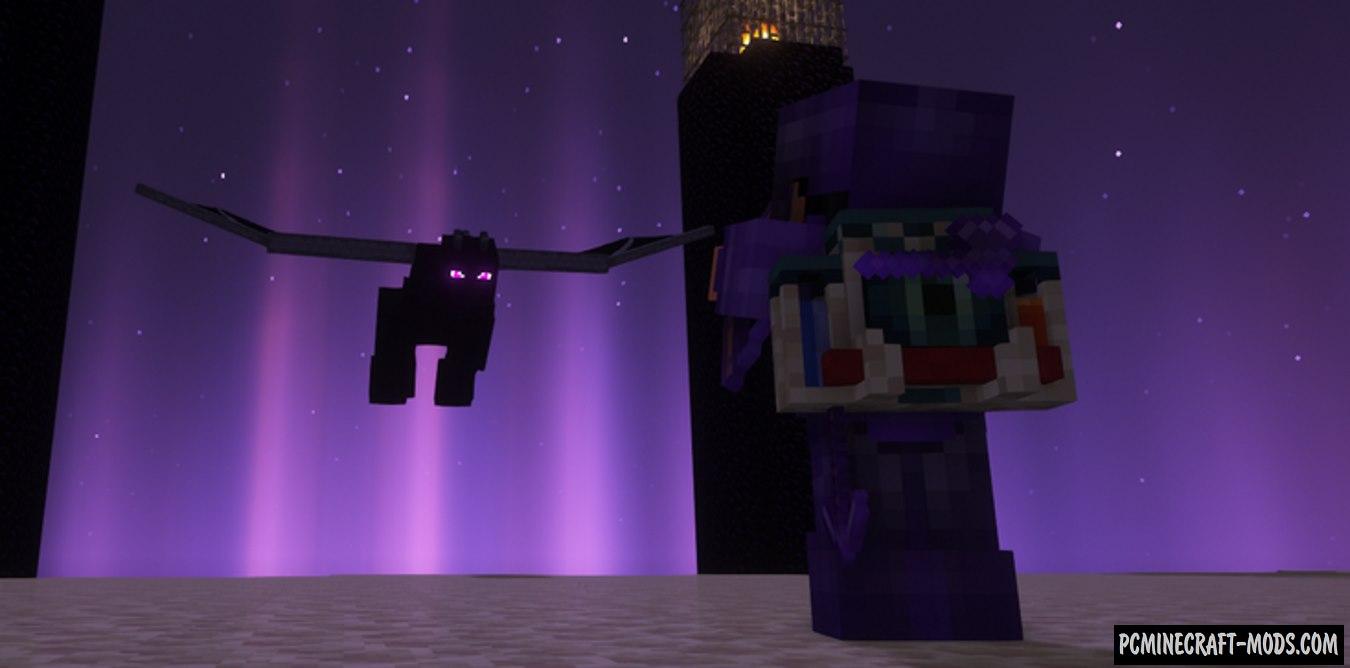
The author of Traveller’s Backpack 1.20-1.19.4 modification decided to create a direct analogue of Adventure Backpack, which has not been updated since 2015. This option adds a multifunctional backpack that in addition to storing items has two additional liquid tanks and even a portable workbench. Now the player will be able to carry a huge amount of both simple resources and advanced technology materials. So this will significantly speed up the process of building complex mechanisms.
It has more than 30 features than the usual modifications that add backpacks. For example, you can wear both armor and a backpack independently of each other. Gradually upgrade the backpack to Tier 5, store more things and travel much further than before.
Features of Traveller’s Backpack
- As you know, most players install more and more modifications, which in turn add hundreds and thousands of new items that simply do not fit into a standard small backpack. Now you can upgrade your backpack to Tier 5, which has 52 inventory slots and 2 liquid containers, each of which can store up to 6 buckets of liquid or 24 bottles of potion.
- If you need even more slots, then you can independently increase the capacity of the backpack in the config file at your discretion.
- You can also use the backpack as a resource chest. For example, to build pipes to pump liquid from the chest into your mechanisms.
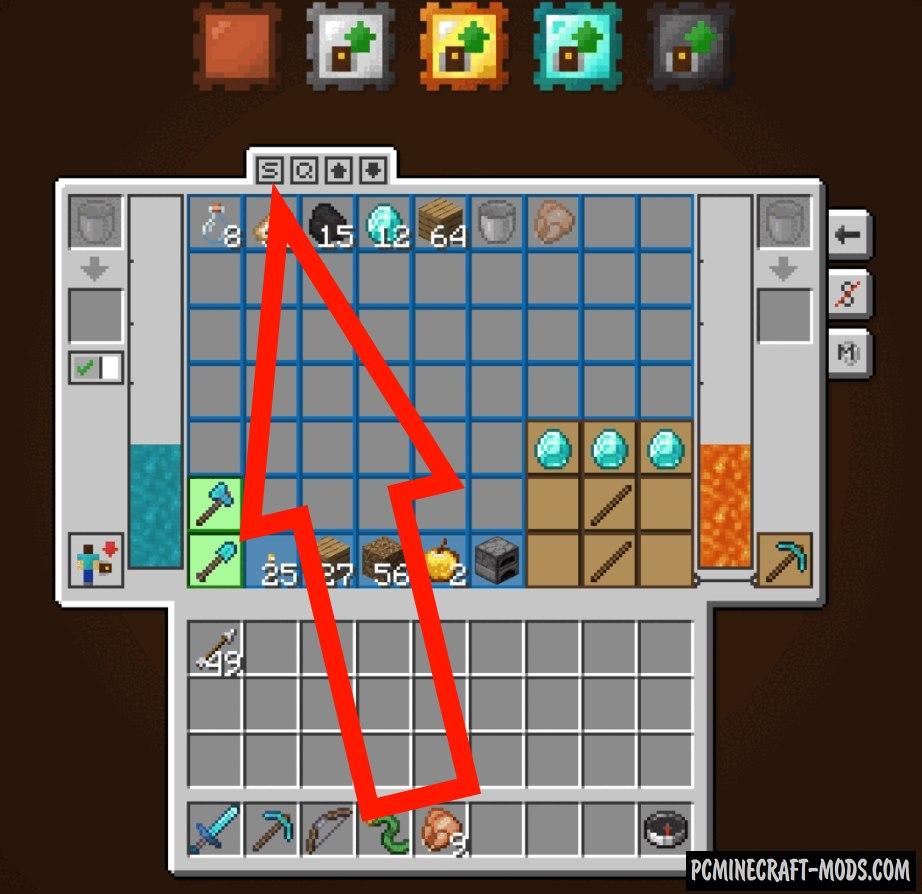
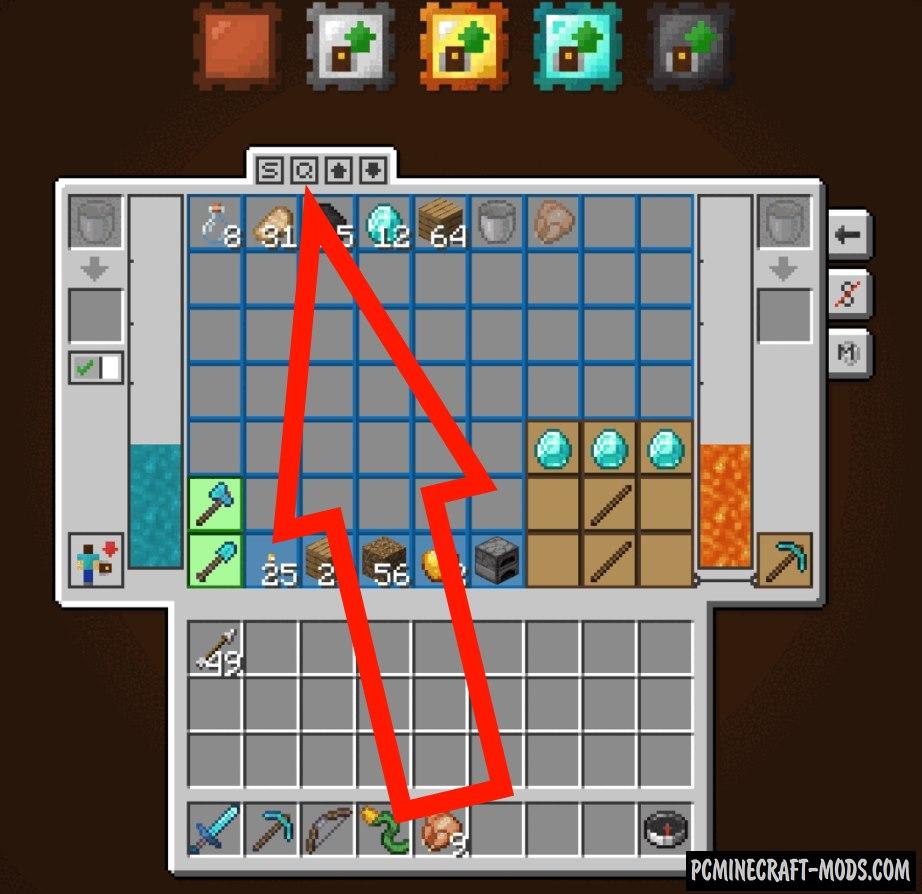
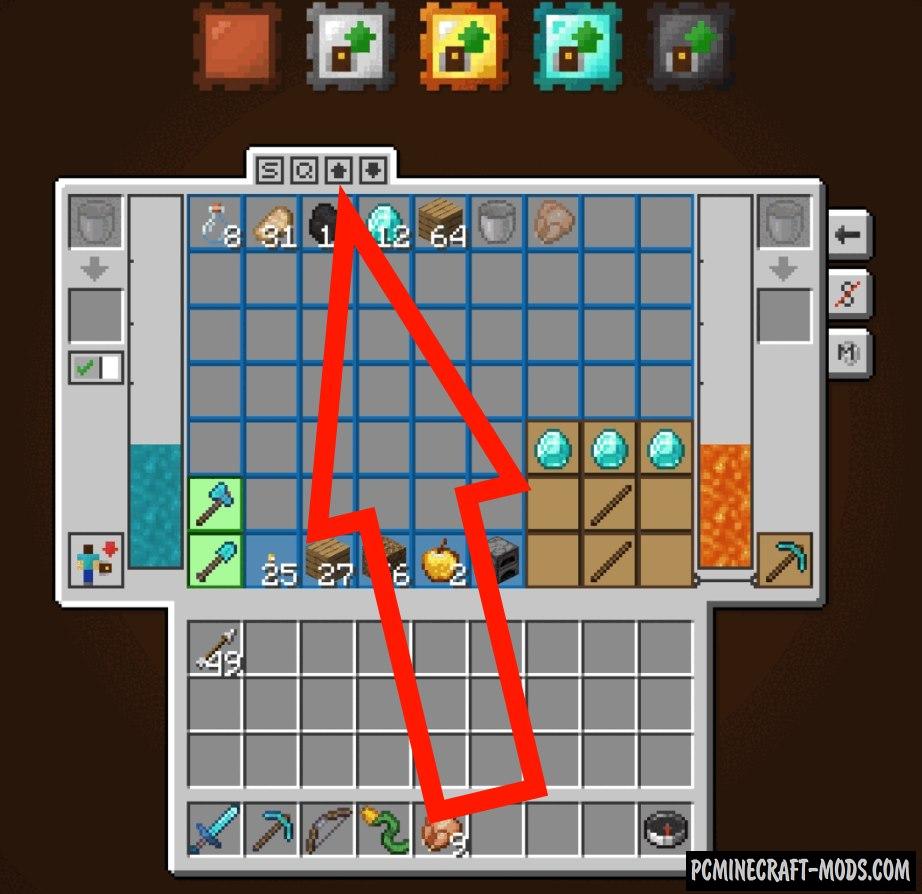
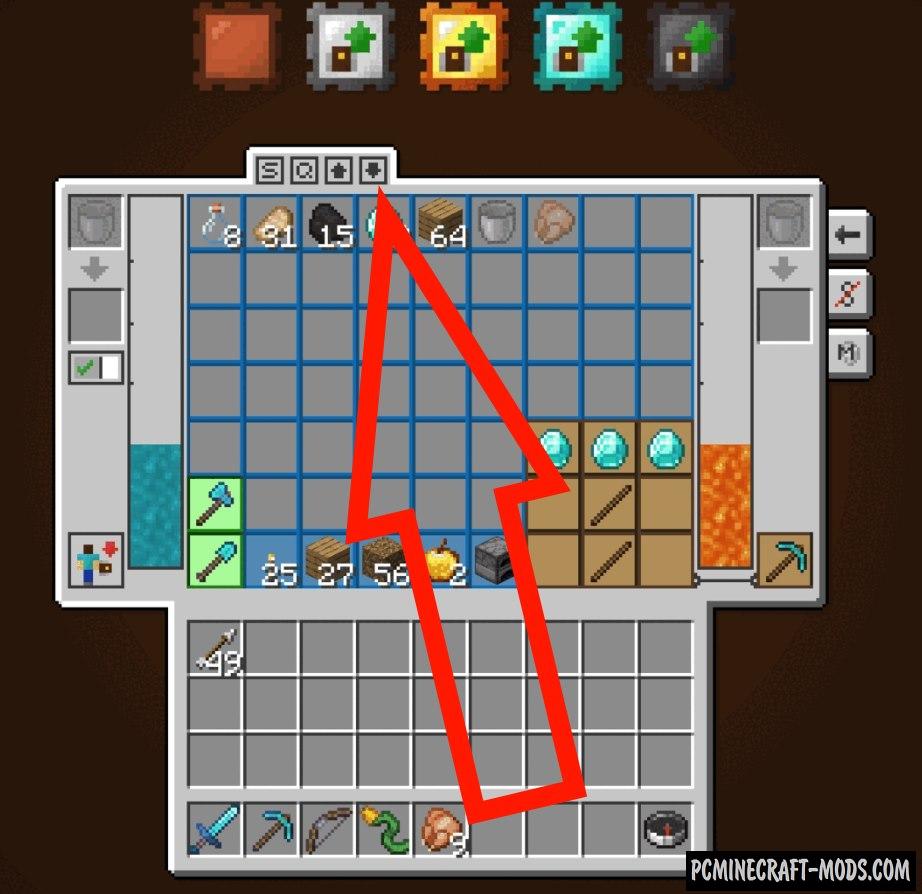
- Additionally, it has special buttons – sorting, quick stacking and transfer for convenient inventory management!
- To avoid inventory overflow, the Backpack Tier can be upgraded to the smithing table. You will need some rare resources to improve and eventually you will get your cherished last Tier called Netherite. To reset the upgrades, put the backpack on the ground and press Shift + with the right mouse button, holding an empty upgrade in your hand.
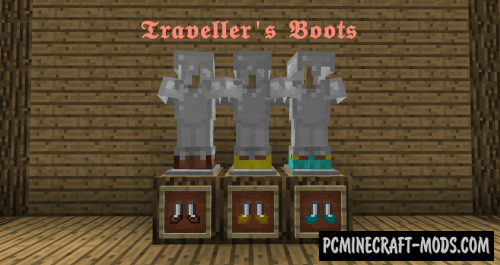
- This has a feature that allows you to combine this mod with Curios, which allows you to wear armor and a backpack regardless of standard slots.
- Now the traveler’s backpack does not need any empty armor slot.
- Now you will be able to access additional inventory that is designed specifically for the backpack. To open this, use the “B” key.
- The most preferred option is a backpack for travelers. Now you will be able to explore more territories and biomes because you will be able to carry more resources with you and use them in different cases.
- You can put a bed in a backpack and it will turn into a reusable sleeping bag that is perfect for long trips. It is also worth remembering that this will not change the starting point of spawn.
- The backpack has many additional slots for special tools. Now you can free the default inventory from the pile of tools and hang them on your backpack.
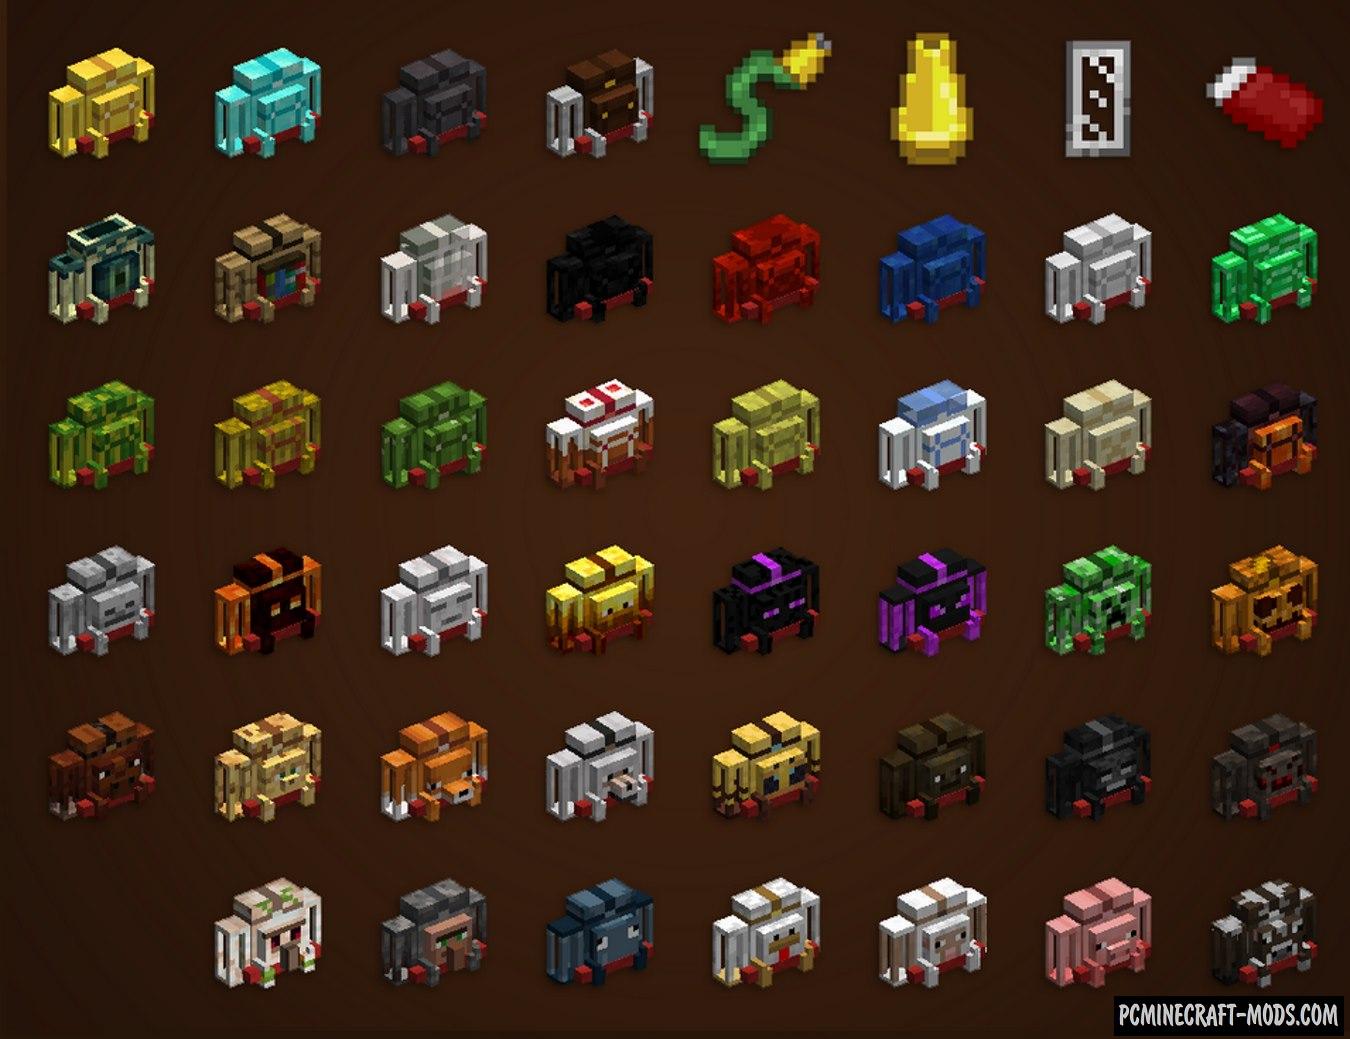
- Added the ability to customize the appearance of the backpack. There are about 45 options in total, which in appearance are associated with various vanilla blocks and mobs.
- Some of the cosmetic options have their own unique features.
- Additionally, you can use dyes to repaint the 3D model of the backpack in the same style as your skin.
Screenshots
List of Traveller’s Backpack levels
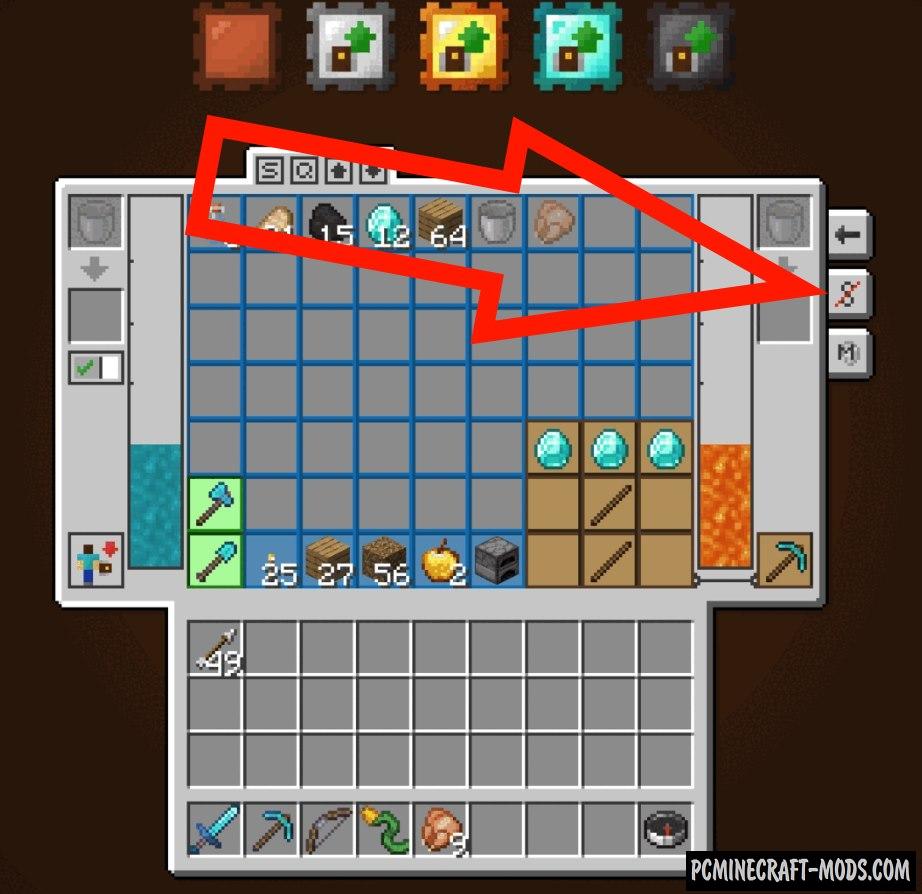
The blue slots show a place where you can store default resources and items, that is, ingredients for crafting and food. Only tools can be placed in the green slots. Brown slots are designed for crafting items. Slots for buckets hold all containers with liquid and potions. If the tank is suitable for liquid, the container will move into the slot under it, and the tank will be filled.
Tier 1
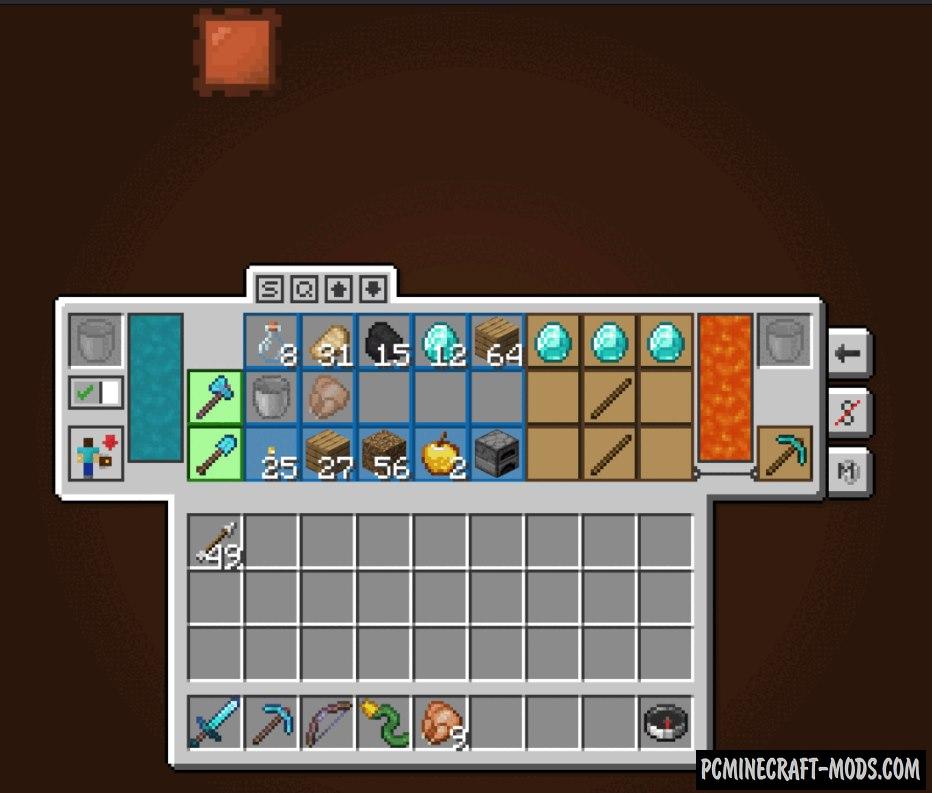
15 blue slots
2 green slots
3 slots for water and lava
Tier 2
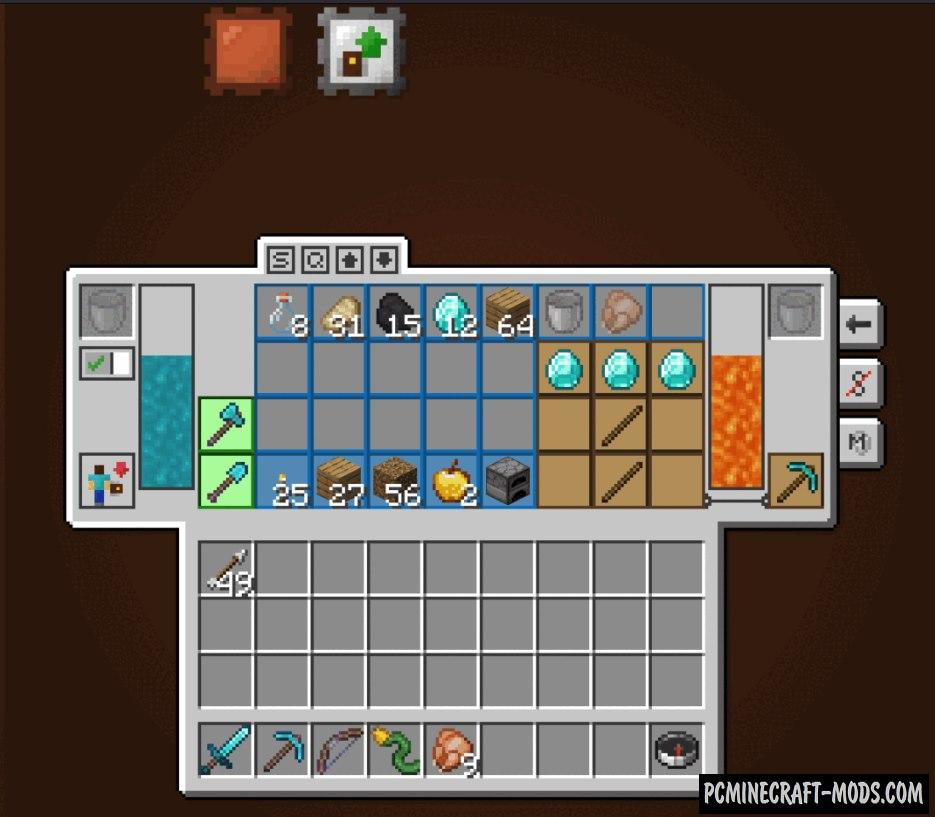
23 blue slots
2 green slots
4 slots for water and lava
Tier 3
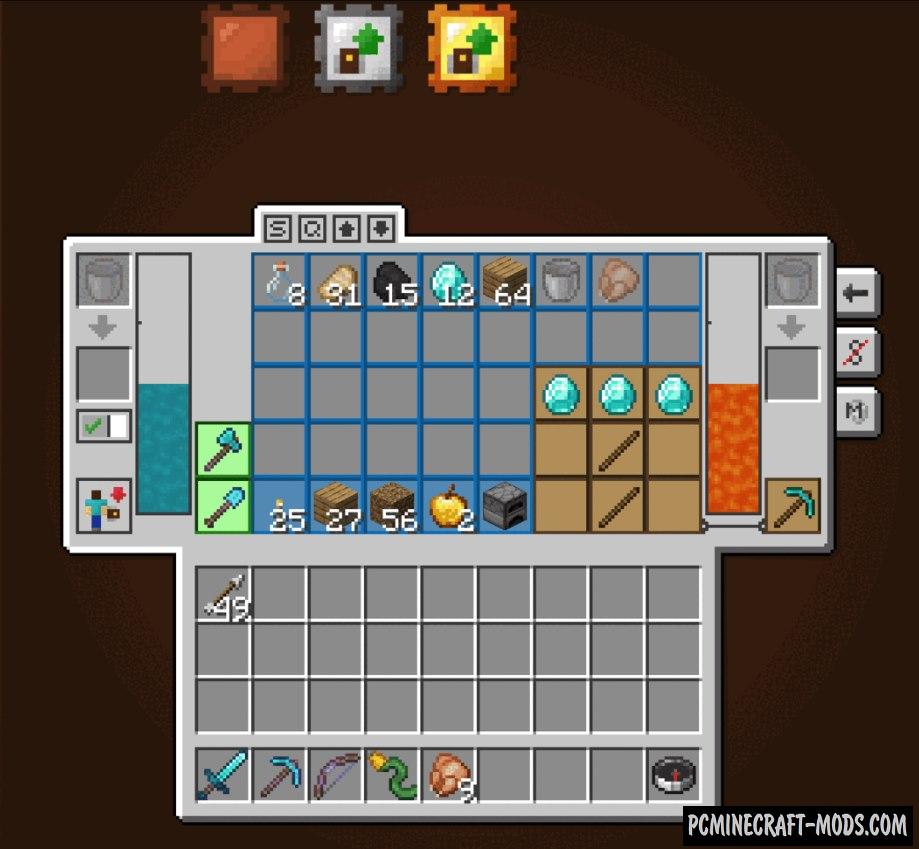
31 blue slots
2 green slots
5 slots for water and lava
Tier 4
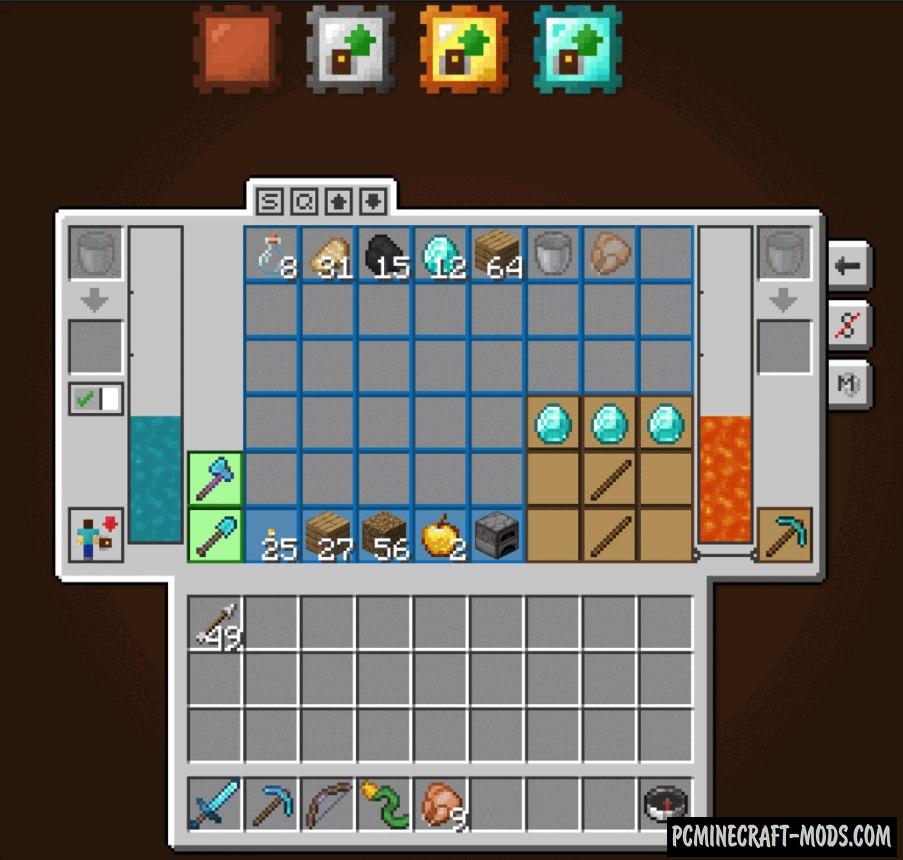
39 blue slots
2 green slots
6 slots for water and lava
Tier 5
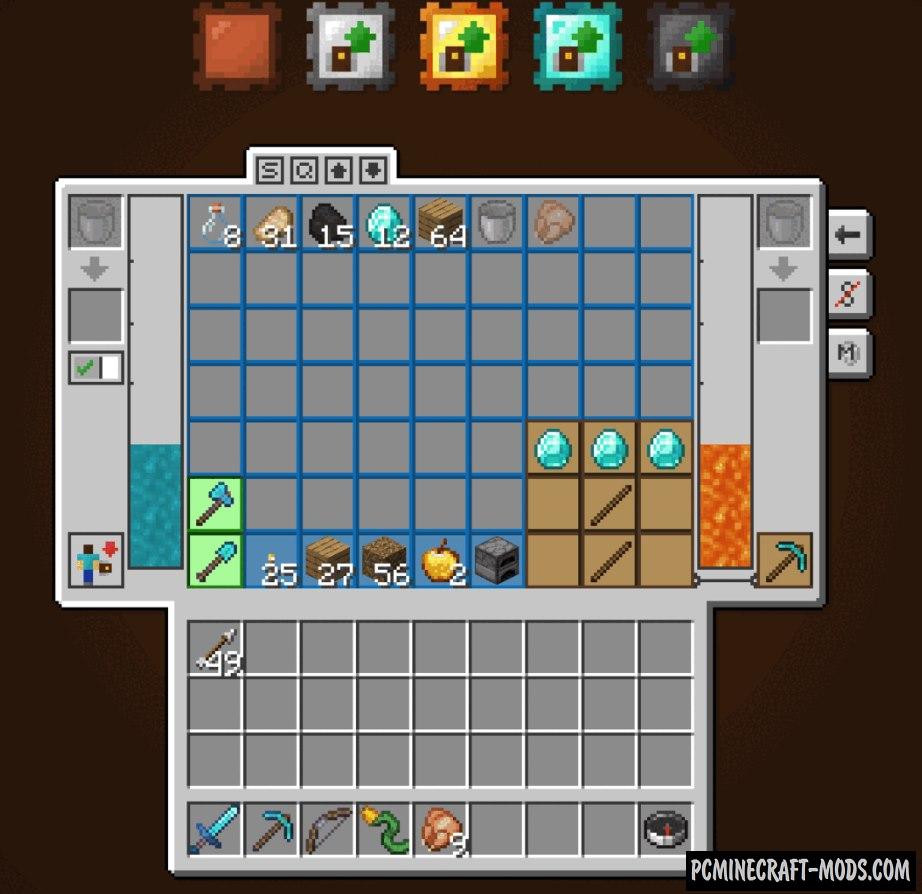
54 blue slots
7 slots for water and lava
2 green slots
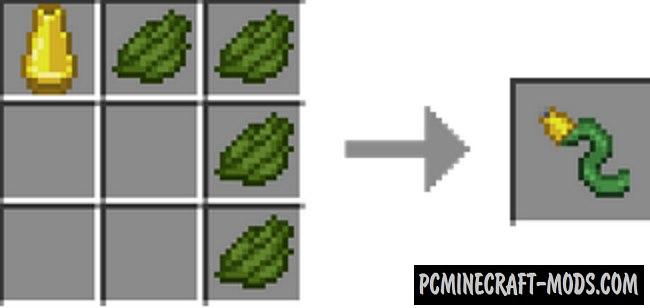
Traveller’s Backpack Craft Recipes
Traveler’s backpack
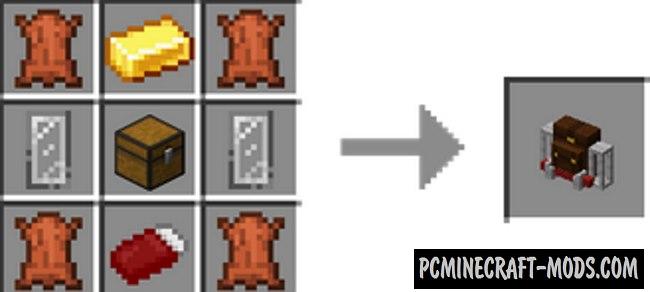
Dyed Traveler’s Backpack
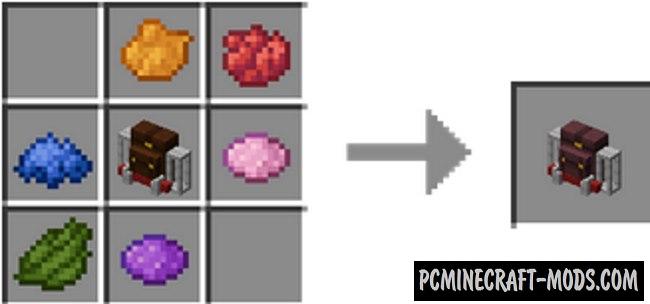
Dyed Traveler’s Backpack2
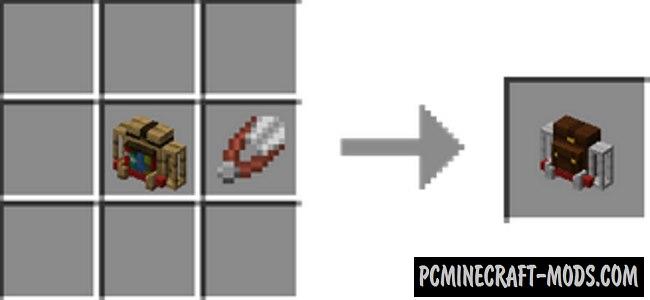
Backpack tank
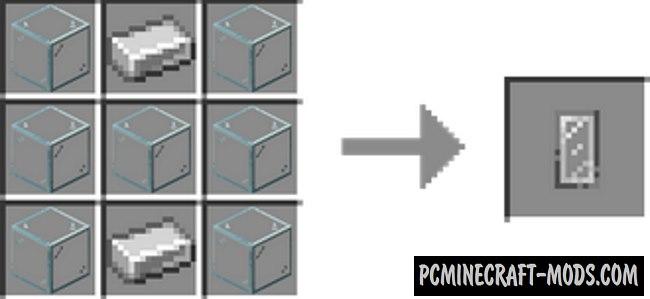
Sleeping bag
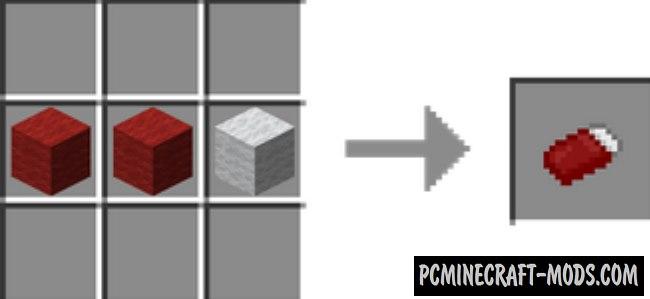
Tier 1 Backpack
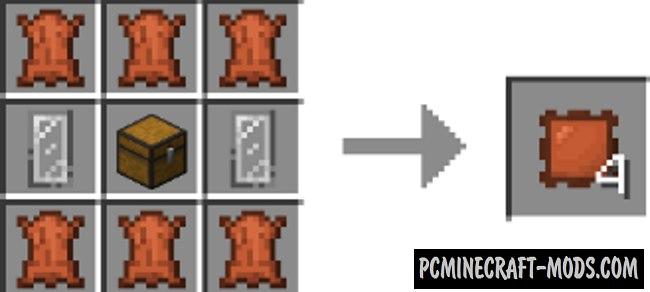
Tier 2 Backpack
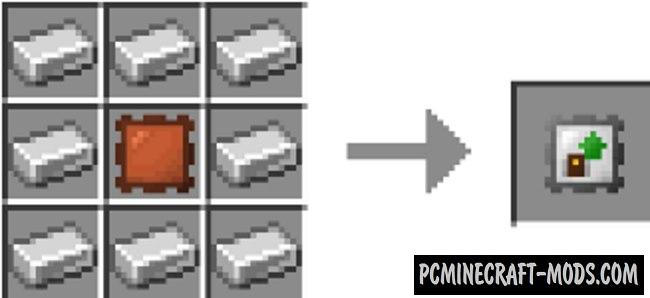
Tier 3 Backpack
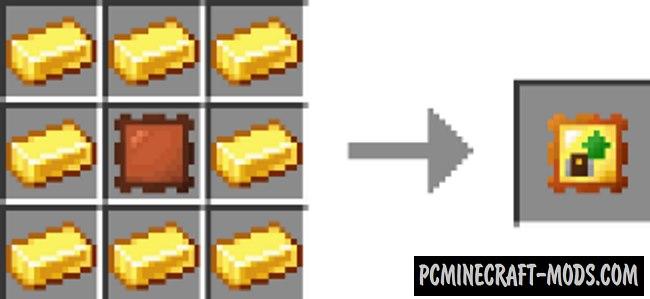
Tier 4 Backpack
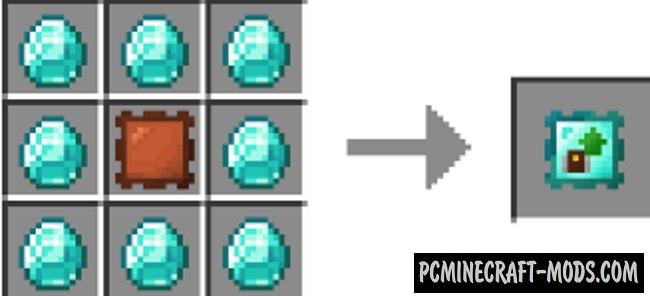
Tier 5 Backpack
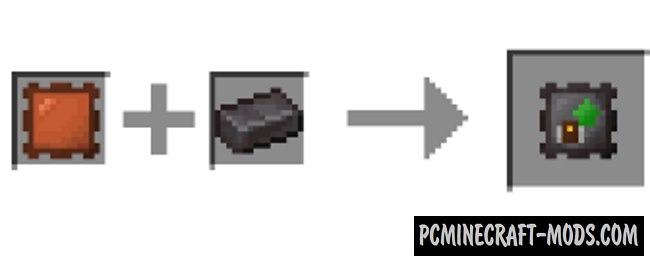
Hose nozzle
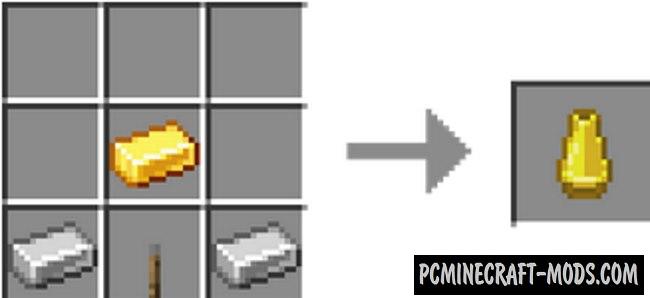
Hose
How to use a Traveller’s Backpack?
- The “Equipment” button is used so that the player understands whether he is wearing a backpack at a given time. If you put it on yourself, then this button will disappear.
- The “Remove” button appears when the player puts on a backpack. This is available in the backpack inventory (By default, it opens with the B button). You can quickly take off your backpack and put it in a standard inventory. Thus, you can very quickly change the backpack to another one that is very convenient.
- The “Sleeping bag” button will be active if you have done all the conditions to warm up the sleeping bag in the right place. To do this, put the backpack on the ground and open the backpack inventory. If everything is done correctly, you will be able to activate the sleeping bag. If the sleeping bag is already unfolded and the player presses the button, the sleeping bag will be folded back into the backpack.
- The “Ability slider” is a unique feature for some backpacks. This will be disabled for default backpacks. If you have a backpack with unique abilities, then it will be activated and you will be able to view the characteristics of the ability.
- The “Sort” button is used as in the Inventory Tweaks mod, that is, it quickly sorts items and also does it in such a way that more useful resources are located at the top of the inventory, and not the necessary ones below.
- The “Quick Fold” button identifies all items in the player’s inventory that can be folded together with the same item inside the backpack, and places them there.
- The “Transfer to backpack” button is used to quickly transfer the entire default inventory to the backpack inventory. Pressing the Shift button will also move all the elements from the player’s quick access toolbar.
- The “Transfer to Player Inventory” button allows you to transfer all items from the backpack to the player’s inventory. Items from slots marked as not subject to sorting will not be transferred.
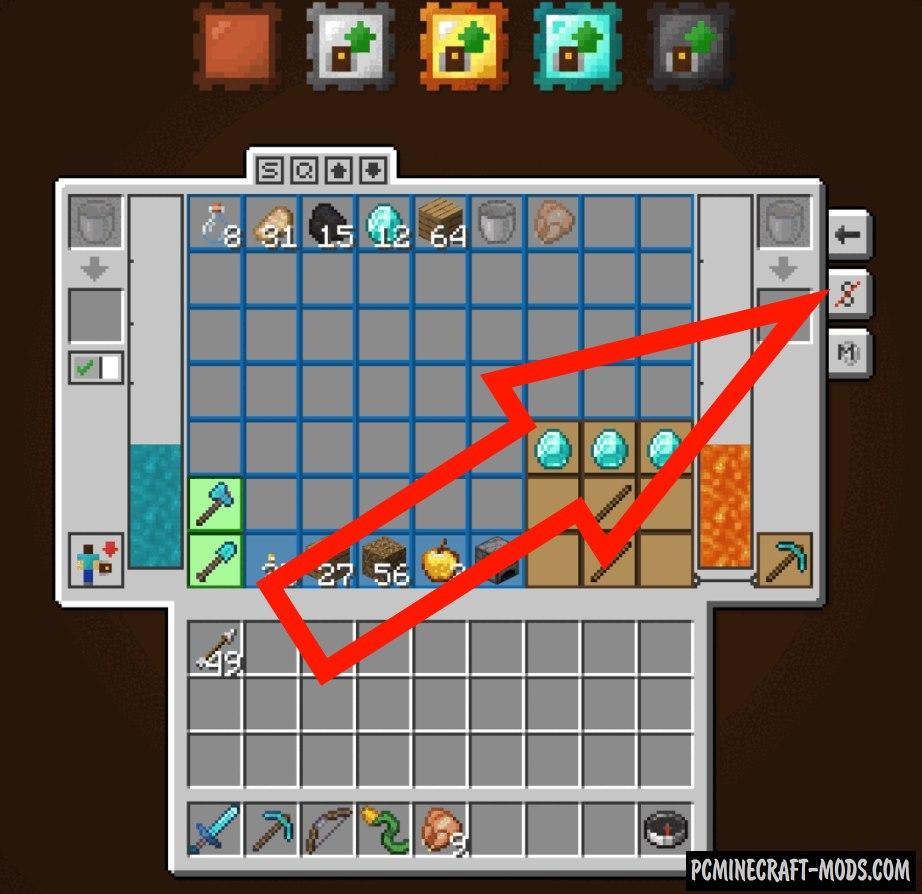
- The “Unsorted Slots selector” is a kind of binder that marks your slots with blue colors, which makes it impossible to move them to any of the inventory.
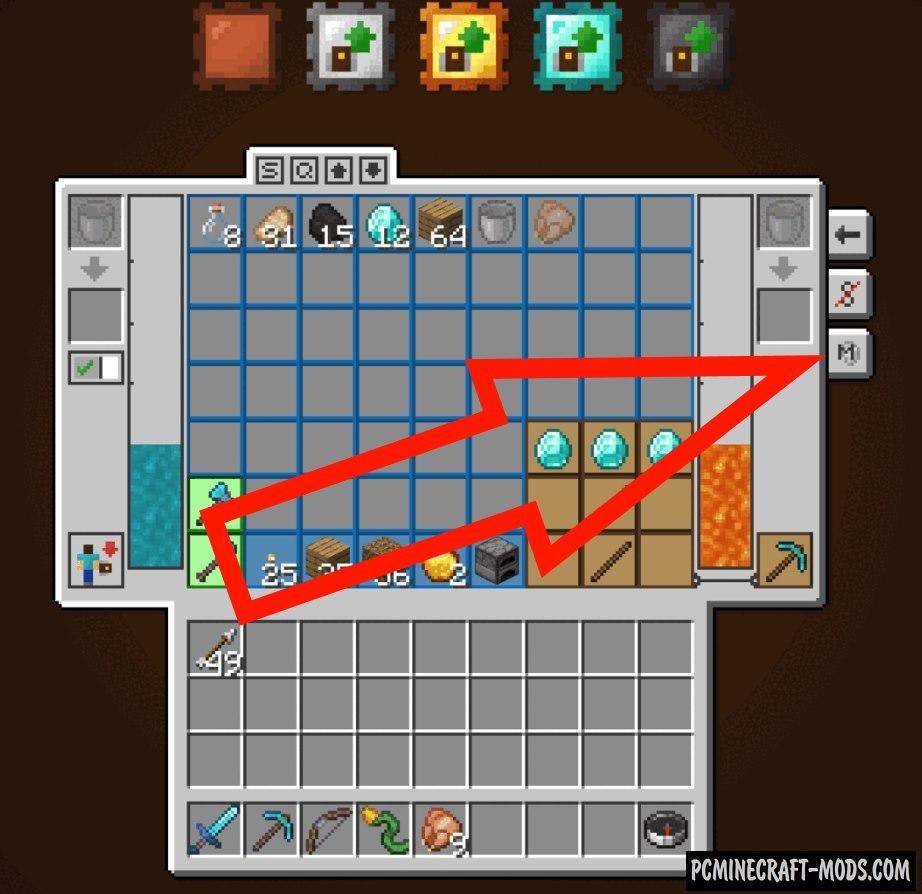
- The “Memory Slot Selector” allows you to click on an item slot to reserve space for that item.
How to install Traveller’s Backpack
- Download and install Forge or Fabric API
- Make sure that you have the “Java” application installed.
- Download the “Zip” archive from our website.
- Inside this is a “Jar” mod. It can also contain old and new builds.
- Select the latest version of the “Jar” file that matches the game version.
- Please note that some releases may contain bugs, incompatibilities with other modifications, and in some cases may cause conflicts within Forge or Fabric. You can try installing the previous build to fix this.
- Move the “Jar” file to the “Mods” folder.
- This folder is located at the following path:
Mac OS X:
/Users/Your Profile Name/Library/Application Support/minecraft/
Quick way to get there: Click on the desktop and then press the combination of “Command+Shift+G” keys at the same time.
Type ~/Library and press the “Enter” key.
Open the Application Support folder and then MinecraftWindows 11, 10, 8, 7:
C:\Users\Your Profile Name\AppData\Roaming\.minecraft\
Quick way to get there: Press the “Windows” key and the “R” key at the same time.
Type %appdata% and press “Enter” key or click OK. - The “Mods” folder is created automatically when you install Forge or Fabric, but you can always create it manually.
- Open the launcher and select the desired modloader.
- Launch the game and enjoy the new gameplay.
- Ready!
Credits
Created by: Tiviacz1337

 (5 votes, average: 4.20 out of 5)